|
Although I do not know anything about hardtops, but I
have been searching. One thing I do know, is that it is much easier to trim
the inside of the hardtop off the car, with the hardtop upside down on a
bench or the garage floor.
Dave Tennant has a hardtop fitted to his car
during the winter. Dave trimmed the
interior himself, but had the exterior trimmed professionally.
I did see a good one done on a
"Midge" at Stoneleigh. The owner had made it from black
polypropylene or something similar and it was the same shape as a normal
hood, like the hood on your car.
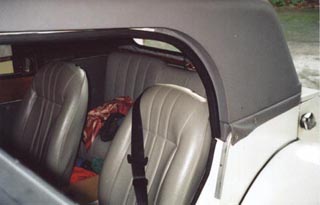
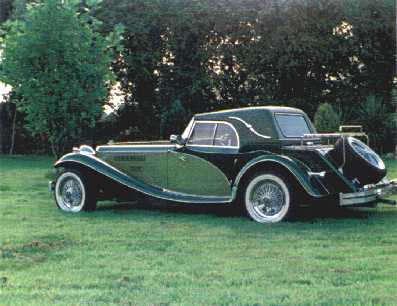
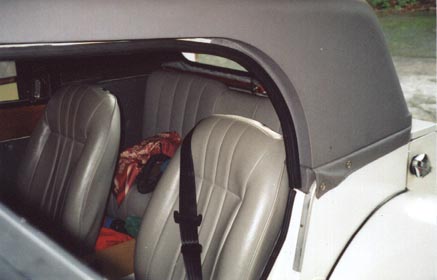
The photo below shows the hardtop on the
Falcon of Nelson Atkinson from Ireland.
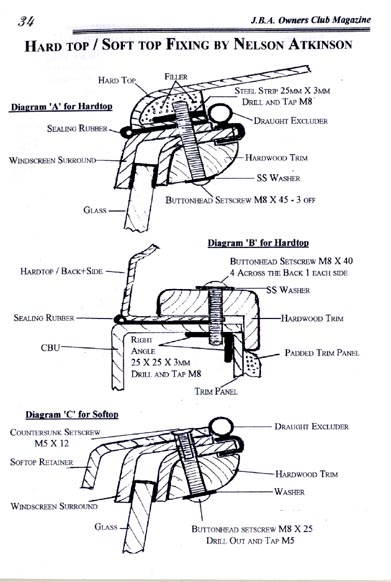
This is how he fixed it to the top of the windscreen
and to the back of the CBU.
HARDTOP CONSTRUCTION
– DAVE TENNANT
The ideal
would be to build the hard top at the same time as the basic kit and not
apply the finishing touches to the car trim until the hardtop has been
matched to the base. However few builders get involved with the hardtop
until much later.
Thus the
hardtop may not be a precise fit onto the base and some of the draught
proofing etc may need changing. In the case of my JBA Falcon I had
previously got the doors and side windows very neatly aligned but had to
sacrifice some of this to get the hardtop draught proof. I have made the
hardtop fit a priority at the expense of the soft top fit in order to
ensure winter warmth!
Good
hardtop fastening at the windscreen is vital to avoid the top lifting
whilst driving into the wind. One way of doing this is to use resin and
fibreglass to bury a strip of metal in the front edge of the hardtop then
tap the metal to allow screws to enter vertically via holes in the
windscreen frame.
For my car
I did not use a metal strip but purchased some m4 steel nuts that were two
or three times the thickness of normal nuts and incorporated a flange.
Unfortunately I cannot find them in a catalogue but they were somewhat
like the nipples used to hold bicycle spokes in place only a larger
diameter. These had plenty of surface area to give maximum adhesion and in
my case the hardtop already incorporated a thickened front edge so I
drilled holes into which I could resin the nuts.
I used brass m4 screws on
the basis that if there was any wear, because of the frequent usage, then
I did not want it on the buried components. But note I am not a
metallurgist! Even though I have to replace the screws sometimes at the
start of winter I am more confident about my method than tapping a thread
into a strip of metal any less than 5mm thick. The screws are
approximately 150mm apart. The distance being calculated to allow
incorporation of the sun visor fixing brackets. A rubber strip is used
between the hardtop and the windscreen
The
brackets used as the soft top frame pivots provide further fixing points.
On my car these pass through horizontal pieces of fibreglass which are
part of the hardtop moulding. I insert Clevis Pins or Dowels through the
soft top brackets on top of the fibreglass to lock it in place. In
hindsight I wish I had reinforced the horizontal pieces of fibreglass,
though there is little room for greater thickness if you put a strip of
rubber between hardtop and base.
Inside, at
the lower rear of the hardtop a piece of hardwood approx 20mm x 200mm by
the width of the car was fastened in place using resin. An "Over
Centre Catch" was then screwed to this wood to create another fixing
point behind the rear seats. I used just one in the centre but perhaps two
would have been safer.
The hardtop
was then covered in Vinyl on the outside. As the appearance of this was
critical to the appearance of the car and could not be touched up with an
aerosol I opted for it to be done by a professional. The inside is much
easier for DIY as the hardtop can be turned upside down and the results
are not on show! Even so I made a mess of it! I used a nylon material that
demanded exceptional quality scissors and frequent new knife blades. An
aerosol type of glue specially for material was used but dried quicker
than I could cut the nylon. Some months later I redid the inside using the
old material as a pattern to pre-cut new material. This time I applied the
glue to one part of the hardtop at a time. The new material was easier to
cut but also I purchased a pair of "Super Scissors", items
advertised as capable of cutting coins in half (which I have seen done).
These are well worth the fiver they cost and have since tackled anything
asked of them.
Surplus
material from the exterior vinyl was used to make a "Curtain"
that was superglued to the base of the hardtop then allowed to hang down
by some 50mm externally ie like an upside down "L". This masked
the joint where the top sits on the base as it was rather ugly. The
professional who did the Vinyl quoted silly money for doing this task. I
used fasteners at the front ends of the "Curtain" to keep it in
place. This often causes me amusement when people inspecting the car jump
to the conclusion that is these fasteners that hold the whole hardtop in
place!
|